
HashiCorp Packer is easy to use and automates the creation of any type of machine image. It embraces modern configuration management by encouraging you to use automated scripts to install and configure the software within your Packer-made images. Packer brings machine images into the modern age, unlocking untapped potential and opening new opportunities.
⇧ どんなタイプの仮想マシンのイメージの作成も自動化できるらしい!
そんな「Packer」ですが、
Packer is part of the HashiCorp Product Suite that enables you to provision, secure, and run any infrastructure for any application. You can provision Packer images using HashiCorp Terraform, handle secrets management with Vault, schedule workloads with Nomad, and connect your infrastructure with a common backbone using Consul.

⇧ 構想としては、「HashiCorp Product Suite」っていう構成の一部なんですと。
HashiCorp のプロダクトの概念というのは、
HashiCorpの開発方針に興味があるのでしたら
はじめにオートメーションありき ―創業者が語るVagrant,Packerを生んだ"HashiCorpのプリンシプル":インタビュー|gihyo.jp … 技術評論社
⇧ 上記サイト様のインタビューで、紹介されてますが、
⇧ HashiCorp のソフトウェアの仕様は、The Tao of HashiCorp で定義されてるみたい。
というわけで、「Packer」について、レッツトライ~。
Packer とは?
なんかアーキテクト図とか見つからんし...
とりあえず、「Packer」が何たるかは、
Packer is an open source tool for creating identical machine images for multiple platforms from a single source configuration. Packer is lightweight, runs on every major operating system, and is highly performant, creating machine images for multiple platforms in parallel. Packer does not replace configuration management like Chef or Puppet. In fact, when building images, Packer is able to use tools like Chef or Puppet to install software onto the image.
⇧ オープンソースで、複数のプラットフォームに対応した仮想マシンのイメージを作成できますと。
A machine image is a single static unit that contains a pre-configured operating system and installed software which is used to quickly create new running machines. Machine image formats change for each platform. Some examples include AMIs for EC2, VMDK/VMX files for VMware, OVF exports for VirtualBox, etc.
⇧ 仮想マシンのイメージってのがプラットフォームによって異なってくるらしく、
| プラットフォーム | 仮想マシンのイメージファイルのフォーマット |
|---|---|
| EC2 | AMIs |
| VMware | VMDK、VMX |
| VirtualBox | OVF |
みたいな例を上げてらっしゃいますね。
Packer をインストール
Packerをインストールする方法としては、3つあるみたい。
Packer may be installed in the following ways:
-
Using a precompiled binary; We release binaries for all supported platforms and architectures. This method is recommended for most users.
-
Installing from source This method is only recommended for advanced users.
-
An unoffical alternative installation method
⇧ 1. の方法はどんな環境にも対応してるってことらしい。
今回は、3. の方法でいきますけど。
そうです、懲りずに、Windows のパッケージ管理ツールである、Chocolatey を使っていきますよ~、Chocolatey をインストールしてない方はインストールしちゃいましょう。
そんでは、コマンドプロンプトを管理者権限で実行して、
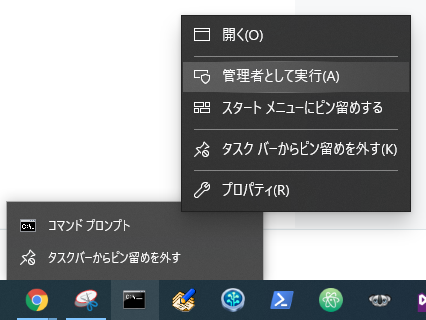
以下コマンドで、「packer」をインストールで。
choco install packer
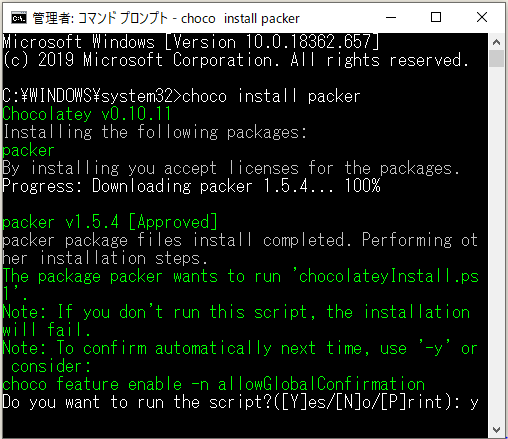

新たにコマンドプロンプトを起動して、インストールされてるか確認。
packer --version

ちなみに、今現在PCに、Chocolateyを使ってインストールされたパッケージ一覧については以下のコマンドで確認できるみたい。
choco list -lo

⇧ なんか収拾がつかない感じ...
Packer で仮想マシンのイメージを作成
で、公式の説明だと、クラウド(AWS)を使う前提の説明しかないんですな...
頼むからオンプレミス環境の場合の方法も載せてくれんかね...
⇧ 上記サイト様 で説明してくれてました。
「Vagrant」で利用するための仮想マシンのイメージ「Vagrant Box」を作るってことなので、厳密な意味での「仮想マシンのイメージ」とは言えないのかもしらんですが。
「Vagrant Box」を作成するには「Vagrant」のインストールが必要そうなので、インストールしときましょう。

⇧ 結構、新しいバージョンだけど、アップグレードできると。
まぁ、今回は現状維持で。
とりあえず、今回インストールしておかないといけないものは、
- VirtualBox
- Vagrant
- Packer
の3つですかね。
あと、ゲストOSのisoイメージファイルがダウンロードできるように、ネットワークにアクセスできることですかね。
ただ、プロキシとかで制限かかってると、ダウンロードできないんですよね...
iso イメージ(仮想マシンにインストールするOSのイメージファイル)は、
⇧ Red Hat Enterprise Linux 8.1をダウンロードしておきました。
まぁ、ボヤキはさて置き、Packerは、JSONファイル(Templatesって言うらしい)に記載した内容に従って、自動的に処理を行ってくれますと。
Templates are JSON files that configure the various components of Packer in order to create one or more machine images. Templates are portable, static, and readable and writable by both humans and computers. This has the added benefit of being able to not only create and modify templates by hand, but also write scripts to dynamically create or modify templates.
⇧ Packerは、コンポーネントって単位で、どんな処理を行うかが決まってるみたい。
で、コンポーネントで設定する値は、JSONなので勿の論で、key : value といった形でいろいろ設定できるらしいんだけど、今のところ設定できるコンポーネント自体は全部で6個らしい。
builders (required) |
an array of one or more objects that defines the builders that will be used to create machine images for this template, and configures each of those builders. For more information on how to define and configure a builder, read the sub-section on configuring builders in templates. |
|---|---|
description (optional) |
a string providing a description of what the template does. This output is used only in the inspect command. |
min_packer_version (optional) |
an array of one or more objects that defines the various post-processing steps to take with the built images. If not specified, then no post-processing will be done. For more information on what post-processors do and how they're defined, read the sub-section on configuring post-processors in templates. |
provisioners (optional) |
an array of one or more objects that defines the provisioners that will be used to install and configure software for the machines created by each of the builders. If it is not specified, then no provisioners will be run. For more information on how to define and configure a provisioner, read the sub-section on configuring provisioners in templates. |
variables (optional) |
an object of one or more key/value strings that defines user variables contained in the template. If it is not specified, then no variables are defined. For more information on how to define and use user variables, read the sub-section on user variables in templates. |
⇧ このうち、builders は必須みたい。builders は仮想マシンのイメージファイルを作成するとこまで行うようです。
provisioners で、仮想マシンのイメージファイルから仮想マシンを作成、作成した仮想マシンにソフトウェアのインストールや設定まで行ってくれるってことみたい。
Packerは公式の情報が少ないので、
⇧ 上記サイト様を参考にさせていただきました。
んで、Linux系は、OSのインストールとかは、KickStart って仕組みを使うのが一般的?なんですかね。
The Red Hat Kickstart installation method is used primarily (but not exclusively) by the Red Hat Enterprise Linux operating system to automatically perform unattended operating system installation and configuration. Red Hat publishes Cobbler as a tool to automate the Kickstart configuration process.
⇧ Red Hat だけなのか、他のLinux ディストリビューションでも使えるのかがよく分からない...
一応、多くのLinux ディストリビューションでKickStart は使えそうですと。
Kickstart is normally used at sites with many such Linux systems, to allow easy installation and consistent configuration of new computer systems.
Kickstart configuration files can be built three ways:
- By hand.
- By using the GUI system-config-kickstart tool.
- By using the standard Red Hat installation program Anaconda.
Anaconda will produce an anaconda-ks.cfg configuration file at the end of any manual installation. This file can be used to automatically reproduce the same installation or edited (manually or with system-config-kickstart).
⇧ ただ、Red Hat installation program Anaconda とか、PythonのAnacondaと紛らわし過ぎる...
はい、脱線しましたが、Linux ディストリビューション全般に言えるのかが分からないのですが、少なくとも、Red Hat Enterprise Linuxでは、
-
DVD や USB フラッシュドライブなどの リムーバブルメディア
-
インストールするシステムに接続している ハードドライブ
-
インストールするシステムからアクセスできる ネットワーク共有
26.2. キックスタートを使ったインストールの実行方法 Red Hat Enterprise Linux 7 | Red Hat Customer Portal
⇧ ってなってますと。
ただ、Packer を使う場合は、このへんが変わってくるのか、参考サイトの皆さん、思い思いの場所に kickStartファイルを配置なさってますと。
というか、KickStartファイル、Scriptsファイル、Vagrantファイル、についても記述がバラバラで何が正解か分からんです...
KickStart を使うと何が嬉しいのかと言うと、
キックスタートファイルを 1 つのサーバーに置くことで、インストール時に各コンピューターが読み込むことができます。この方法を使用すると、1 つのキックスタートファイルで複数のマシンに Red Hat Enterprise Linux をインストールできるため、ネットワークおよびシステム管理者には理想的な方法になります。
高度な RHEL インストールの実行 Red Hat Enterprise Linux 8 | Red Hat Customer Portal
⇧ ってな具合に、複数のマシンの環境を準備できますと。
とりあえず、適当なディレクトリに必要なファイル群を配置。

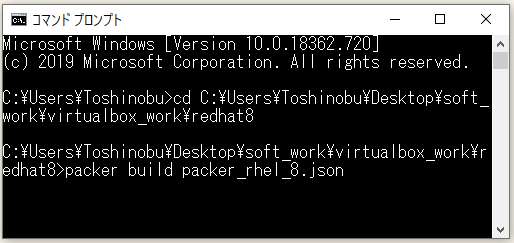
んで、必要なファイル群が整ったところで、Packerの処理を記載したJSONファイルのあるディレクトリに移動して、以下のコマンドを実施。
packer build [packerの処理を記載したJSONファイル]

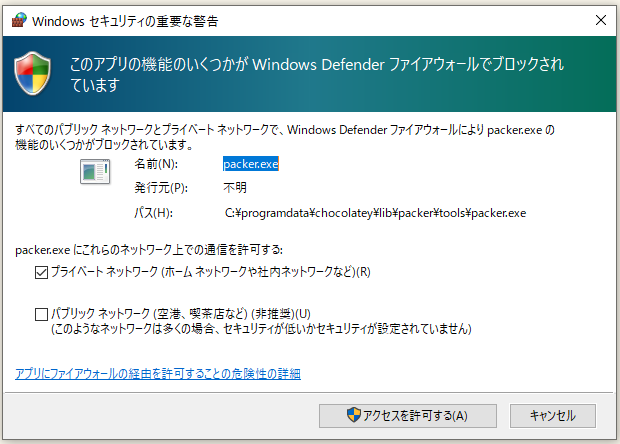
ホストOSが、Windows とかだと、Packer を使用しての初回ネットワーク接続とか絡む場合は、ファイアウォールの警告が出ますが、「アクセスを許可する(A)」で。

⇧ 最終的に、「Builds finish. The artifacts of successful builds are:」ってなって処理が終われば、OKかと。
JSONファイルの中で、"post-processors"の、"output" に指定したファイルが作成されてれば大丈夫かと。
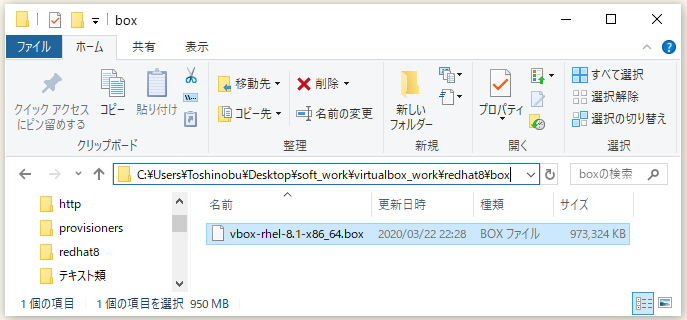
boxファイル以外にも、cacheとかもできますが、
C:.
│  packer_rhel_8.json
│  rhel-8.1-x86_64-dvd.iso
│
├─box
│      vbox-rhel-8.1-x86_64.box
│
├─http
│      ks.cfg
│
├─packer_cache
│  │  afa7695602909b267b26b23c8aefe12db6ee78b2.iso.lock
│  │  e0829642bf518828676fda5c2502fd75ea3a305b.iso.lock
│  │
│  └─port
│          3815
│          5957
│
└─provisioners
        cleanup.sh
⇧ こんな感じになりました。
ちなみに、PackerのProvisionersコンポーネントの処理で、cleanup.shってスクリプトを実行してるのは、Boxの容量を圧縮する処理らしいんだが、圧縮でエラーになるのは期待通りの挙動らしい...
No space left on device was expected. This command
dd if=/dev/zero of=wipefile bs=1M
ubuntu - error writing 'wipefile': No space left on device - Super User
⇧ ディスクに発生したフラグメンテーションの部分をゼロ埋めして、ゼロ埋めされた部分を削除するってことをやりたいらしく、「もうゼロ埋めできるスペースないよ」ってことでエラーになるそうな...分かりづらい。
ちなみに、最終的な、Packer build 実行前のフォルダ構成なんかは、
C:.
│  packer_rhel_8.json
│  rhel-8.1-x86_64-dvd.iso
│
├─box
│      vbox-rhel-8.1-x86_64.box
│
├─http
│      ks.cfg
│
└─provisioners
        cleanup.sh
⇧ってな感じです。
各ファイルは、
{
  "variables": {
      "vm_name": "packer-rhel-8.1-x86_64",
      "iso_url_0": "file:///C:/Users/Toshinobu/Desktop/soft_work/virtualbox_work/redhat8/rhel-8.1-x86_64-dvd.iso",
      "iso_sha256": "2323ad44d75df1a1e83048a34e196ddfedcd6c0f6c49ea59bf08095e3bb9ef65",
      "host_only_ip": "192.168.33.102",
      "lower_ip": "192.168.33.101",
      "upper_ip": "192.168.33.254",
      "netmask": "255.255.255.0"
  },
  "builders": [
    {
      "type": "virtualbox-iso",
      "vboxmanage": [
        ["modifyvm", "{{.Name}}", "--memory", "2048"],
        ["modifyvm", "{{.Name}}", "--cpus", "4"],
        ["modifyvm", "{{.Name}}", "--nic2", "hostonly"],
        ["modifyvm", "{{.Name}}", "--hostonlyadapter2", "VirtualBox Host-Only Ethernet Adapter"],
        [
          "dhcpserver", "remove", "--ifname", "VirtualBox Host-Only Ethernet Adapter"
        ],
        [
          "dhcpserver", "add", "--ifname", "VirtualBox Host-Only Ethernet Adapter",
          "--ip", "{{user `host_only_ip`}}",
          "--netmask", "{{user `netmask`}}",
          "--lowerip", "{{user `lower_ip`}}",
          "--upperip", "{{user `upper_ip`}}",
          "--enable"
        ]
      ],
      "http_directory": "../redhat8/http",
      "iso_urls":[
          "{{user `iso_url_0`}}"
      ],
      "iso_checksum": "{{user `iso_sha256`}}",
      "iso_checksum_type": "sha256",
      "boot_wait": "10s",
      "boot_command": [
          "<tab> text ks=http://{{ .HTTPIP }}:{{ .HTTPPort }}/ks.cfg<enter><wait>"
      ],
      "disk_size": 204800,
      "guest_os_type": "RedHat_64",
      "ssh_host": "127.0.0.1",
      "ssh_port": 22,
      "ssh_username": "vagrant",
      "ssh_password": "vagrant",
      "guest_additions_path": "VBoxGuestAdditions_{{.Version}}.iso",
      "virtualbox_version_file": ".vbox_version",
      "vm_name": "{{user `vm_name`}}",
      "ssh_wait_timeout": "10000s",
      "shutdown_command": "echo 'vagrant' | sudo -S shutdown -P now"
    }
  ],
  "provisioners": [
    {
      "type": "shell",
      "execute_command" : "echo 'vagrant' | {{ .Vars }} sudo -E -S sh '{{ .Path }}'",
      "override": {
        "virtualbox-iso": {
          "scripts": [
            "../redhat8/provisioners/cleanup.sh"
          ]
        }
      }
    }
  ],
  "error-cleanup-provisioner": {
    "type": "shell-local",
    "inline": ["echo 'rubber ducky'> ducky.txt"]
  },
  "post-processors": [
    {
      "type": "vagrant",
      "override": {
        "virtualbox": {
          "output": "../redhat8/box/vbox-rhel-8.1-x86_64.box"
        }
      }
    }
  ]
}
⇧ hostonlyadapterとかあんまり意味無かったかも...
あと、iso_urls の値は、自分の場合は、一旦、ダウンロードしたisoイメージファイルをローカルのディレクトリに配置しておいたのを利用してるのですが、他にも異なる設定ができるので、各々の利用環境に合わせてください。
それにしても、Windowsのファイルパスって煩わしさ満載ですね...
何とかならんもんかね...
lang en_US
keyboard us
timezone Asia/Tokyo --isUtc
#platform x86, AMD64, or Intel EM64T
reboot
cdrom
bootloader --location=mbr --append="rhgb quiet crashkernel=auto"
zerombr
clearpart --all --initlabel
autopart
network --bootproto=dhcp --device=enp0s3 --noipv6 --activate --onboot=yes
network --bootproto=static --device=enp0s8 --gateway=192.168.33.1 --ip=192.168.33.102 --netmask=255.255.255.0 --ipv6=auto --activate --onboot=yes
auth --passalgo=sha512 --useshadow --kickstart
firewall --disabled
selinux --permissive
eula --agreed
firstboot --disable
text
rootpw --plaintex password
services --enabled=NetworkManager,sshd
skipx
group --name=vagrant --gid=5000
user --name=vagrant --plaintext --password=vagrant --gid=5000 --uid=5000 --groups=vagrant,wheel

# %packages is area that lists of packages available in Red Hat Enterprise Linux x.x.
%packages --ignoremissing --excludedocs
@base
@core
@standard
@web-server
@network-server
@development
dhcp-server
openssh-clients
sudo
openssl-devel
readline-devel
zlib-devel
kernel-headers
kernel-devel
net-tools
vim
wget
curl
rsync
%end

# %post is area that command after done install
%post
dnf install -y sudo
echo "vagrant ALL = (ALL)  NOPASSWD: ALL" >> /etc/sudoers
sudo sed -i "s/^.*requiretty/#Defaults requiretty/" /etc/sudoers

wget -q http://curl.haxx.se/ca/cacert.pem -O ~/.cacert.pem
echo ca-certificate = ~/.cacert.pem >> ~/.wgetrc
update-ca-trust

mkdir /home/vagrant/.ssh
chmod 0700 /home/vagrant/.ssh

cd /home/vagrant/.ssh
wget --no-check-certificate https://raw.githubusercontent.com/hashicorp/vagrant/master/keys/vagrant.pub -O /home/vagrant/.ssh/authorized_keys
chmod 0600 authorized_keys
chown vagrant:vagrant authorized_keys

cd /home/vagrant
chown vagrant:vagrant /home/vagrant/.ssh
%end
⇧ ネットワークの設定は微妙です、よく分かってません。
# 仮想ハードディスクをゼロで埋める
dd if=/dev/zero of=/EMPTY bs=1M
# ゼロで埋まったファイルを削除(フラグメンテーションの問題を解決)
rm -f /EMPTY
# ファイル削除の前に、Packerが処理を終了しないようにさせる
sync
全体的にモヤモヤしカ残らんかった...
Packerも分かりにくいけど、KickStartファイルにむちゃくちゃ時間取られた(涙)。
お時間ある方は、NG集で詳細がご覧になれます。
今回はこのへんで。
2020年3月23(月)追記 : ↓ ここから
box がちゃんと、起動するか確認しようとしたところ、VagrantとVirtualBox のバージョン齟齬でエラーになったとです...。
VagrantとVirtualBox のバージョン対応表とか見当たらず、
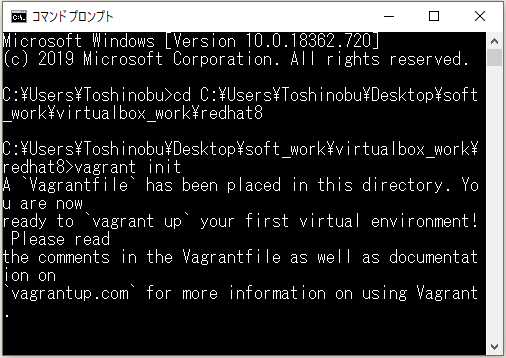

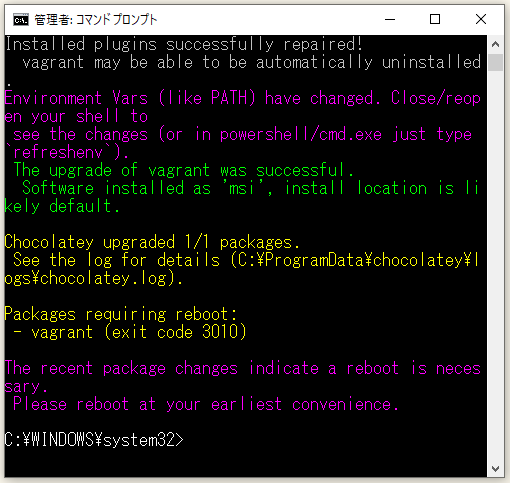
Vagrantのバージョンを最新に上げました。(VirtualBox のバージョンも、6.1.4 と最新だったので。)


vagrant init コマンドで、Vagrantfileができてるけど、中身が駄目駄目なので、
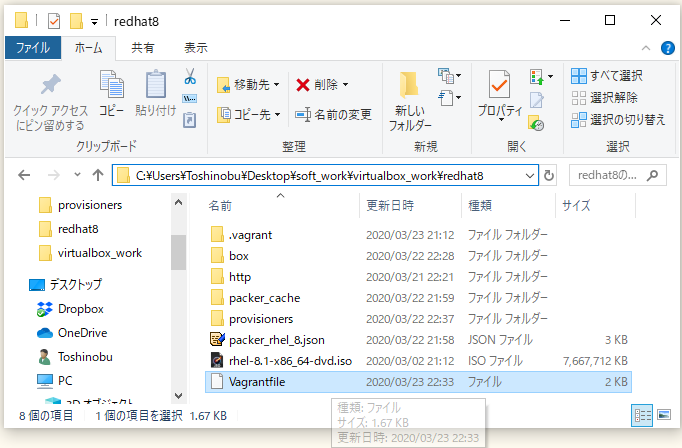
こんな感じに書き換えます。参考サイト様の丸パクリですが...。
# -*- mode: ruby -*-
# vi: set ft=ruby :

rhel_version = 8.1
if "#{ENV['RHEL_VERSION']}" != ""
  rhel_version = "#{ENV['RHEL_VERSION']}"
end

use_activationkey = false
if "#{ENV['RHSM_ACTIVATIONKEY']}" != ""
  use_activationkey = true
end

VAGRANTFILE_API_VERSION = "2"
Vagrant.configure(VAGRANTFILE_API_VERSION) do |config|
  config.vbguest.auto_update = false
  config.vm.network "private_network", ip: "192.168.33.102"
  config.ssh.insert_key = false
  # Guest additions not install during packaging
  # config.vm.synced_folder '.', '/vagrant', disabled: true
  config.vagrant.plugins = ["vagrant-registration", "vagrant-vbguest"]

  if Vagrant.has_plugin?("vagrant-proxyconf")
    config.proxy.enabled = false
  end

  if Vagrant.has_plugin?('vagrant-registration')
    #config.registration.skip = true
    config.registration.name = "packer-rhel"
    if use_activationkey
      config.registration.org = "#{ENV['RHSM_ORG']}"
      config.registration.activationkey = "#{ENV['RHSM_ACTIVATIONKEY']}"
    else
      config.registration.username = "#{ENV['RHSM_USERNAME']}"
      config.registration.password = "#{ENV['RHSM_PASSWORD']}"
    end
  end

  # VirtualBox.
  config.vm.define "virtualbox" do |virtualbox|
    virtualbox.vm.hostname = "vbox-rhel-#{rhel_version}"
    virtualbox.vm.box = "rhel/#{rhel_version}"
    virtualbox.vm.box_url = "file:///C:/Users/Toshinobu/Desktop/soft_work/virtualbox_work/redhat8/box/vbox-rhel-#{rhel_version}-x86_64.box"

    config.vm.provider :virtualbox do |v|
      v.gui = false
      v.memory = 2048
      v.cpus = 4
    end

    config.vm.provision "shell", inline: "echo Hello, World"
  end

end
⇧ 「config.vm.network "private_network", ip: "192.168.33.102"」「virtualbox.vm.box_url」のあたりは、ご自分の環境に合わせてください。
2020年4月12日(日)追記:↓ここから
すみません、参考にしたサイトの環境、多分、Linuxっすね、完全に騙されましたわ。Windows環境だとVagrantfile 内で環境変数を読み込むのに、Vagrantのpluginが必要っぽいです。
つまり、上記のVagrantfileの「#{ENV['RHEL_VERSION']}」とか、軒並み全滅(何も読み込まれてない)という感じでした、申し訳ない。
⇧ 上記サイト様にあるように、「dotenv」ってのを読み込んで、「.env」ファイルもVagrantfileのあるフォルダに配置して、「.env」ファイルに読み込みたい変数を設定しとく必要があるみたい。
Vagrantfile 内は ENV['CLIENT_ID'] のような形で環境変数にアクセスしているということはすぐに分かった。
⇧ Linux環境とかなら環境変数を読み込んだりできるかな?
いまいち、Vagrantのドキュメント見てもよく分からん...
Vagrant has a set of environmental variables that can be used to configure and control it in a global way. This page lists those environmental variables.
⇧ どっちにしろ、Vagrantのデフォルトで用意されてる環境変数は少ないし、そもそも環境変数を読み込むって記載の例がVagrantのドキュメントに載ってないんよね...
あとは、yamlファイルとかに設定しておいて読み込むって方法もあるらしい。
どっちにしろ、外部ファイルに依存するって話を、
⇧ 上記サイト様が仰ってましたかね。
難しいっすな。
「Direnv」ってのもあるらしいってのを
⇧ 上記サイト様が仰っておりますが、「Direnv」の更新はかなり前に止まってる...って思ったら、
⇧ こっちのほうに上がってるdirenv は、ちゃんとメンテナンスされてる。こっちを使っていけば良い感じですかね?
あ、でも、Unix系のOSじゃないと駄目って...
Prerequisites
⇧ また、Windowsは除け者っすか。
早く、WSL2が正式リリースされて欲しいっすね。
2020年4月12日(日)追記:↑ここまで
ちなみに、
The Red Hat CDK Vagrant box for the Virtualbox virtualization provider does not come with the Virtualbox Guest Additions software pre-installed because of a licensing-incompatibity issue. Users who attempt to work around the absence of Virtualbox Guest Additions by installing the software using the vagrant-vbguest plugin are advised that it is not possible to use both the vagrant-vbguest and vagrant-registartion plugins together. If you wish to install either one of the plugins, make sure that the other one is not installed.
⇧ ってな問題があるらしく、GuestAdditions が有効にできない~...

で、もう一回、vagrant upで。
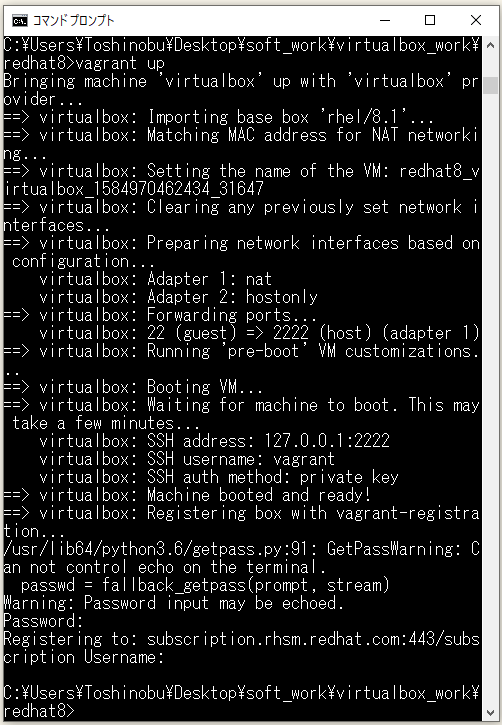

仮想マシンが起動しました~。
Vagrantfileで指定した「config.vm.network "private_network", ip: "192.168.33.102"」のIPアドレスにSSH接続します。
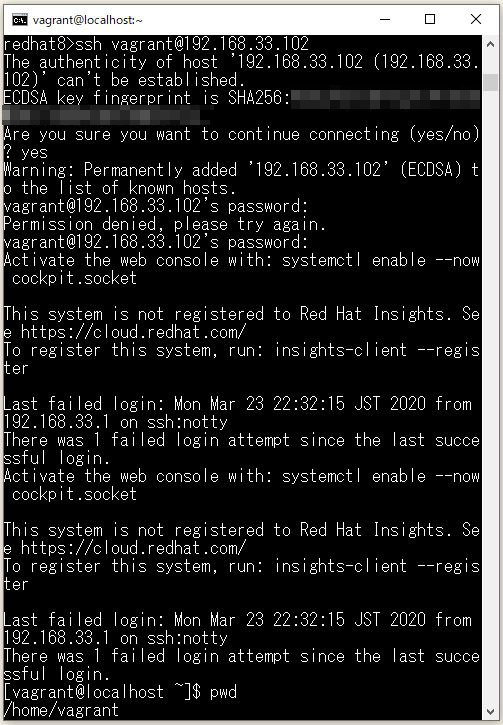
⇧ ログインできました。
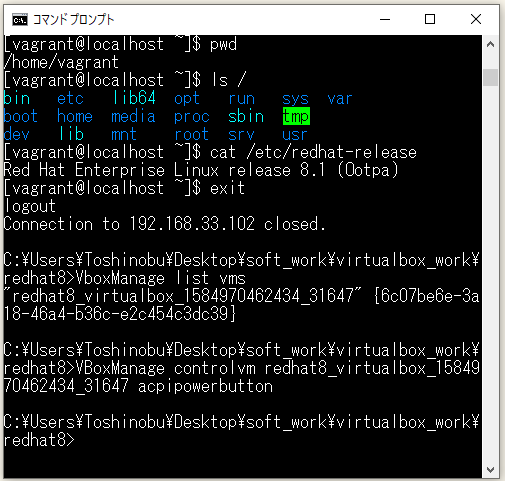
ログアウトして、仮想マシンを停止で。
VBoxManage controlvm [仮想マシン名] acpipowerbutton

2020年3月23(月)追記 : ↑ ここまで
NG集
めちゃくちゃ泥沼にハマった(涙)。
春分の日から始まる連休の3日間もすべて潰れたし、もう私の時間を返して欲しい。
ここからは、NG集ですんで、お時間のある方のみご照覧ください。
何回か失敗して、原因がよく分からんが
⇧ メモリーが足りてなかったらしい、参考サイトの人たちが、軒並み 512 とか設定してたけど、Red Hat の公式の必要システム要件を見ると、Red Hat Enterprise Linux 6 以上を使う場合の「Minimum required memory」は、「1GB(1024MB)」は必要って言っていて、どう見ても参考サイトの設定だと動きそうにないな~、何か特殊な錬金術でも使ってるんかな~、って感じで諦めて、2048 に引き上げたところ、処理が進みました、謎過ぎる。
んで、処理が進んだんだけど、

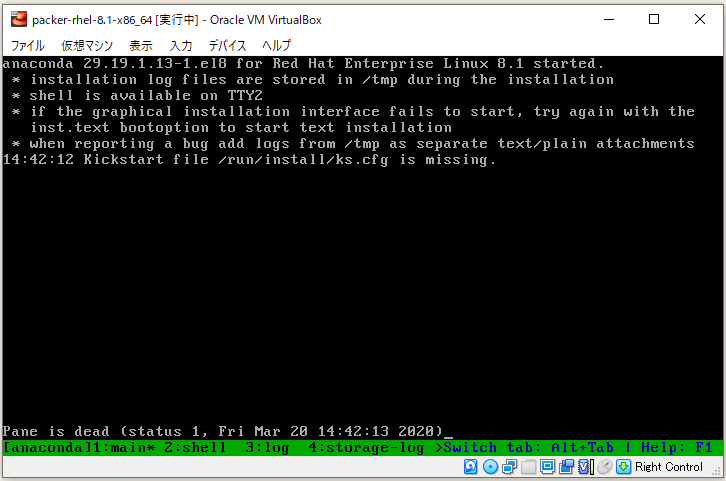
最終的に、KickStart ファイルが見つからんと...
どうやら、
taeisheauton4programming.blogspot.com
キックスタートファイルに適切な権限を与えないと、下記のようなエラーで失敗した。
failed to fetch kickstart from
Kickstart file /run/install/ks.cfg is missing
Pane is dead
⇧ 権限の問題なのかな?
ただし、「Kickstart file /run/install/ks.cfg is missing」ってメッセージが表示されても「altキー + tabキー」を押下すると、切り替わって、OSのバージョンは表示される...
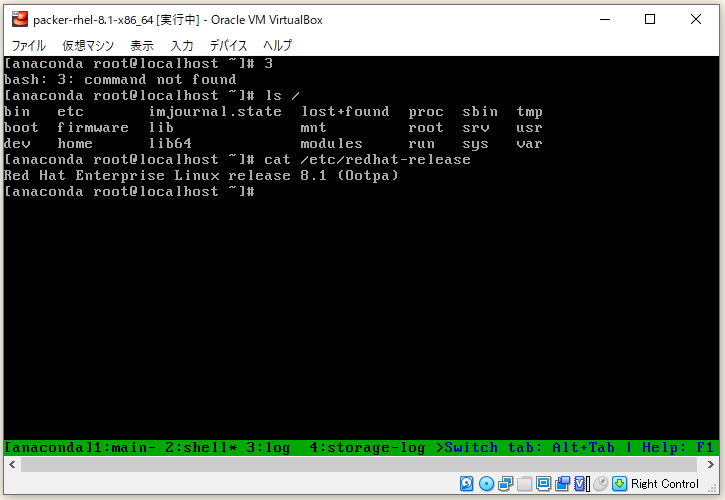
ただ、Packerの処理が途中で進んでないんですよね...

⇧ なんか、SSHが有効にならないって言われてるらしいんだけど、そもそも、ks.cfgファイルの中で、authorized_keys が作られていない気がするんだけどね、
キックスタートコマンドの sshkey は任意です。インストール済みシステムで、指定したユーザーの authorized_keys ファイルに SSH キーを追加します。
B.3. システム設定用キックスタートコマンド Red Hat Enterprise Linux 8 | Red Hat Customer Portal
⇧ 不思議なことに、sshkey の設定の説明はあるんだけど、authorized_keys については全く触れられてないというね、少なくとも、KickStart のsshkey が実行される前には、authorized_keys が用意されてないといけない気がするんだけどね...
sshkey オプションは諦めました。
そして、やっぱりインストールが上手くいってないらしい...
The two guilty lines might be:
dracut-pre-udev[489]: modprobe: ERROR: could not insert 'floppy': No such device
dracut-pre-udev[489]: modprobe: ERROR: could not insert 'sha256_mb': No such device
didn't see that from the log of the successful installations.
⇧ 上記サイト様によりますと、上記のメッセージが表示されてると駄目らしい。
何だよ~、インストール失敗してるのに、OSのバージョン表示できるとか紛らわしいな~。
バージョン7系だけど、
Resolution
- The messages can be safely disregarded
⇧ 衝撃...無視して良いらしい...
それでもSSHの問題は残ってて、
⇧ 上記サイト様を参考に何やかんややってみるも駄目で...
結局、「Kickstart file /run/install/ks.cfg is missing」の原因は、KickStartファイル(拡張子「.cfg」)の記述が良くなかったらしい...
どうやら、KickStartファイル(拡張子「.cfg」)で、コメントの中に、日本語を入れるのが駄目っぽい、っていうかコメントの中身もちゃんと見てるんだ...というか、コメントの記載に対する注意事項とかあるなんて、そんなん、見当たらんかったけど?
分からんわ~!
もう、本当に、長らくLinux環境をご愛顧してきた人にしか分からん情報とか止めて!
一見さんお断りは、京都だけにしといて!いや、京都をディスってるわけではないんですが、内輪だけ盛り上がる的なのって、どうなの?って思ってしまうんですけどね。
ちなみに駄目なコメントは、
# %packagesは、インストールしたいライブラリを記載する。
⇧ ってな感じで、コメントに Japanese を記載するは許されないのであった...
こんなん知るか~!
でもね、
まず、キックスタートファイルを作成する際には次の点に注意します。
-
記号 (#) で始まる行は、コメントとして処理され、無視されます。
⇧ 無視され取らんやんけ!
まぁ、バージョン6系の情報だけどさ~、バージョン8系だと書いてくれてないんだもん、書いてないんだから、バージョン6系と同じって捉えるなっていうのは酷じゃないですか?
お陰様で、これだけで、3日間を無駄にしてしまったやないかい(涙)。
とにかく、エラーメッセージがドイヒー過ぎる。
何かしら、KickStartファイルの記述が誤っていると、軒並み、「Kickstart file /run/install/ks.cfg is missing」になってしまうんですかね。
ちなみに、KickStartファイルの雛型は、RedHat公式のKickStartファイルジェネレーターで作成できるみたい。利用する場合は、

⇧ 「GO TO APPLICATION」をクリックすると、ログイン画面になるので、Red Hatアカウントでログインすれば、利用できます。

⇧ キャプチャ画像だと「Basic Configulation」しか見えてないけど、下の方にスクロールしてくと、他にもいろいろ設定する項目があるので、自分の利用したいように設定して、最後に「DOWNLOAD」をクリックすると、KickStartファイルがダウンロードされます。
今回はこのへん。