いきなり、Javaとの連携は厳しそうなので、前回配置したAngularJSのプロジェクトで、公式のチュートリアルにトライしていきたいと思います。
EclipseにAngular IDE 2017 CI 8プラグインをインストール
Eclipseを起動し、前回作成したAngularJSのプロジェクト「my-app」の中の「src」>「app」>「app.components.ts」を開こうとすると、

TypeScriptのファイル( 拡張子が「.ts」)を編集するためにプラグインをインストールするように促してくれます。今回は、「AngularJS 4系」に対応しているらしい「Angular IDE 2017 CI 8」を「インストール」。(頻繫にバージョンが変わっているようです。)
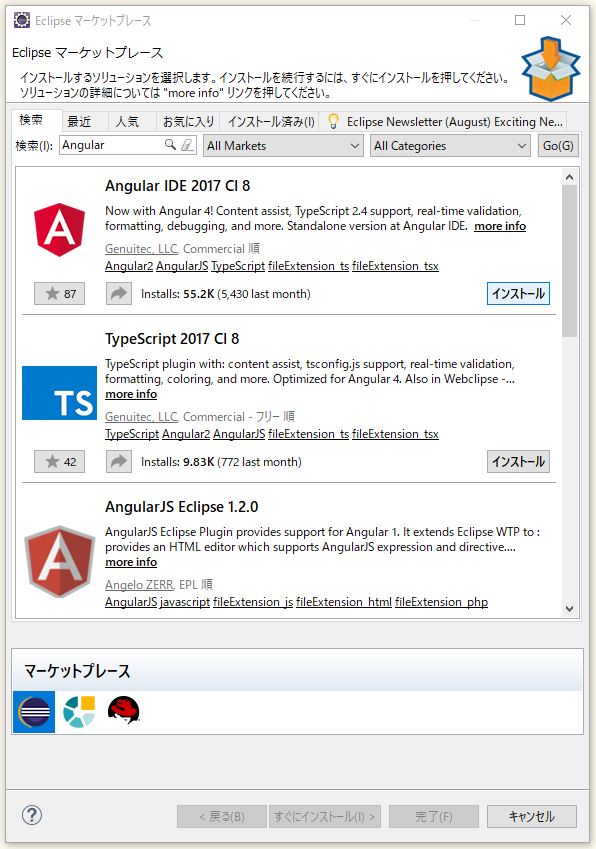
「確認(C)>」をクリック。
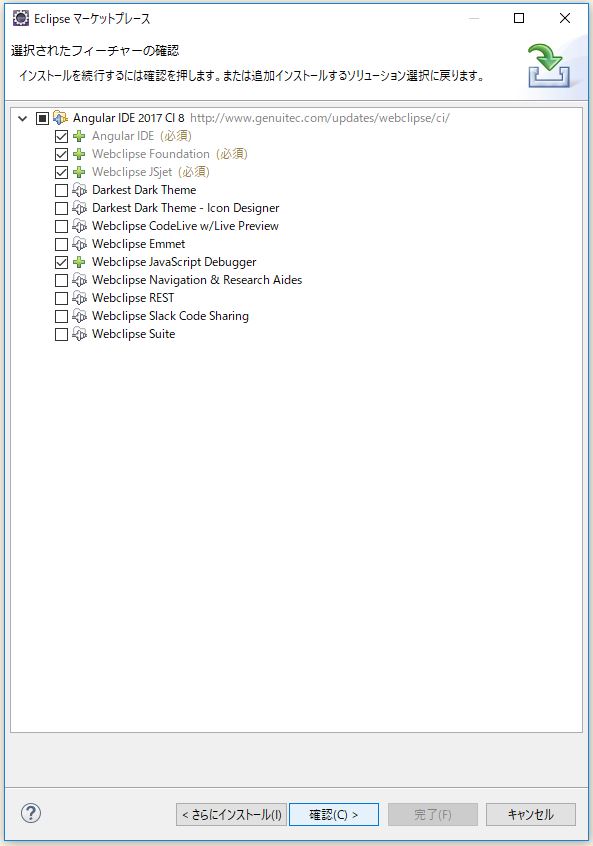
もしかしたら、「TypeScript 2017 CI 8」のインストールも促されたら、「TypeScript 2017 CI 8」も追加します。
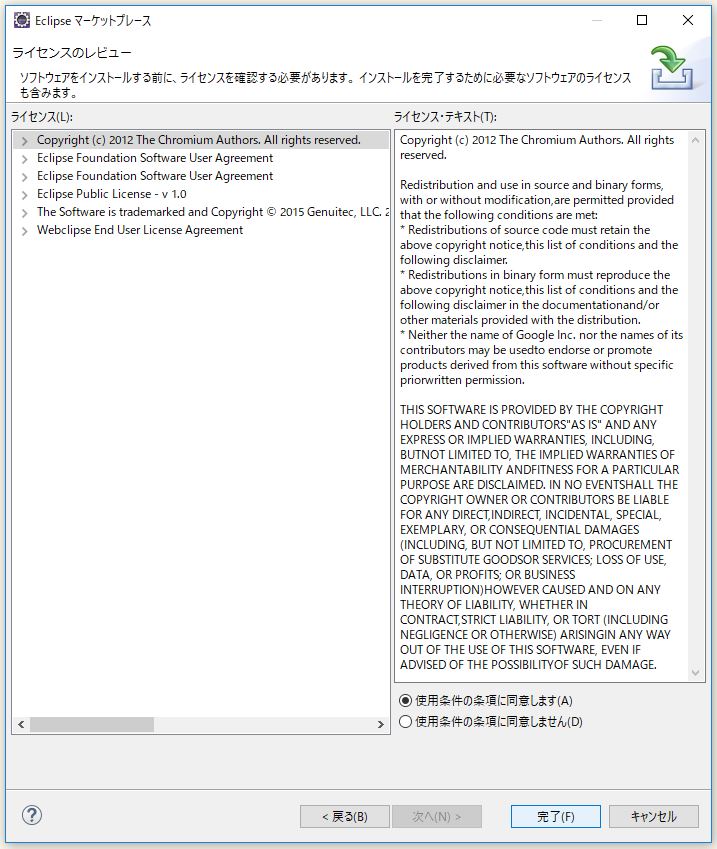
「使用条件の条項に同意します(A)」にチェックし、「完了(F)」をクリック。
再起動を促されるので、「はい(Y)」をクリック。

再起動中。

「Angular IDE 2017 CI 8」がインストールできました。

AngularJSのチュートリアル
さっそくやっていきましょう。
https://angular.io/guide/quickstart を実装していきます。
「my-app」の中の「src」>「app」>「app.components.ts」を編集。
import { Component } from '@angular/core';

@Component({
  selector: 'app-root',
  templateUrl: './app.component.html',
  styleUrls: ['./app.component.css']
})
export class AppComponent {
  title = 'My First Angular appだよ~、ブタ野郎';
}
保存したら、続いて、「my-app」の中の「src」>「app」>「app.components.css」を編集。
h1 {
  color: #369;
  font-family: Arial, Helvetica, sans-serif;
  font-size: 250%;
}
そしたら、コマンドプロンプトなどで
cd C:\workspace\firstSpring\src\main\resources\static\my-app
ng serve --open
サーバーを起動。
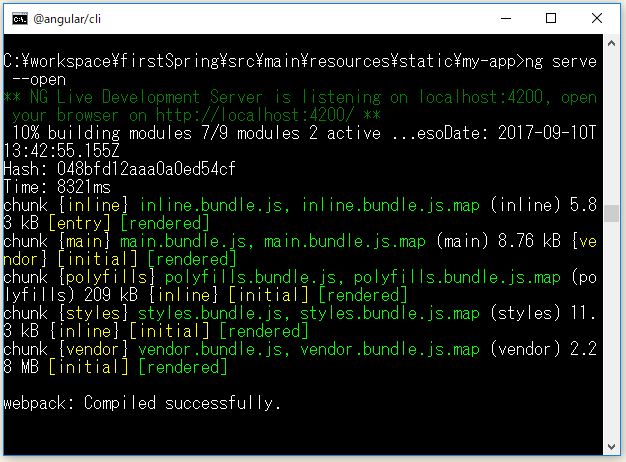
ブラウザの表示も変わりました。
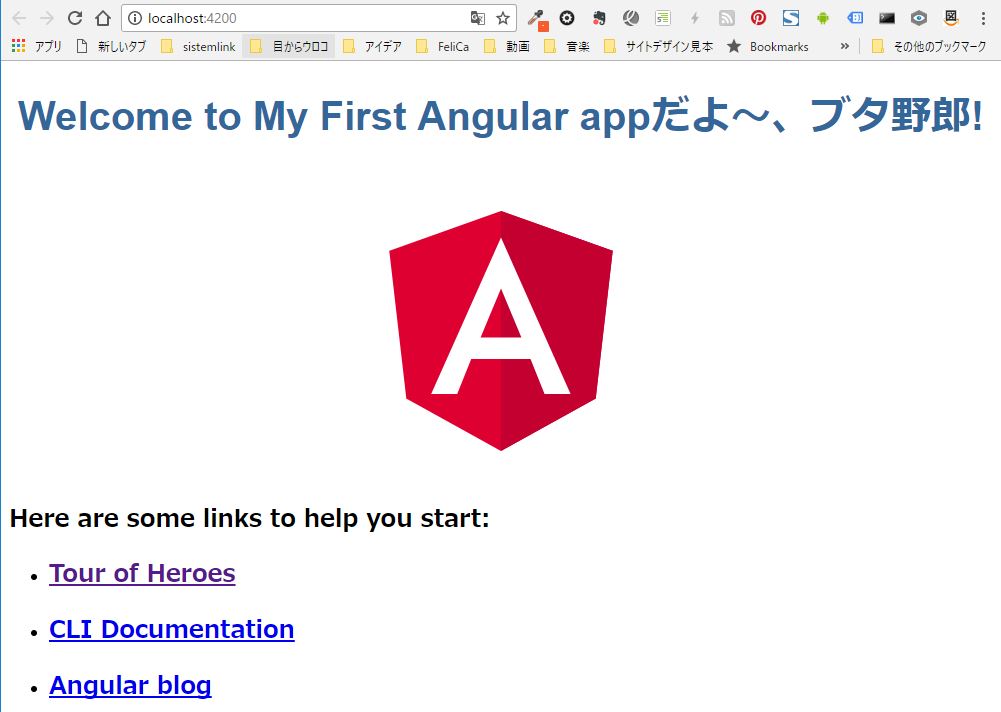
クリント・イーストウッド のセリフで結構「ブタ野郎!」ってでてきますよね。
チュートリアル - The Hero Editor
2つ目のチュートリアルを作成します。 「Ctrl + C」でサーバーを停止しておいて、
cd ../
ng new angular-tour-of-heroes
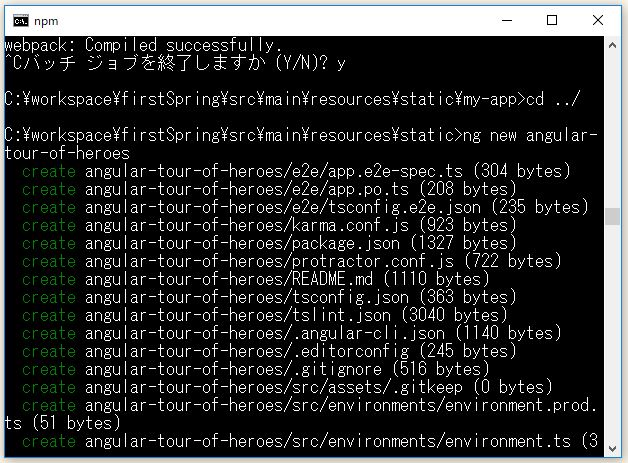
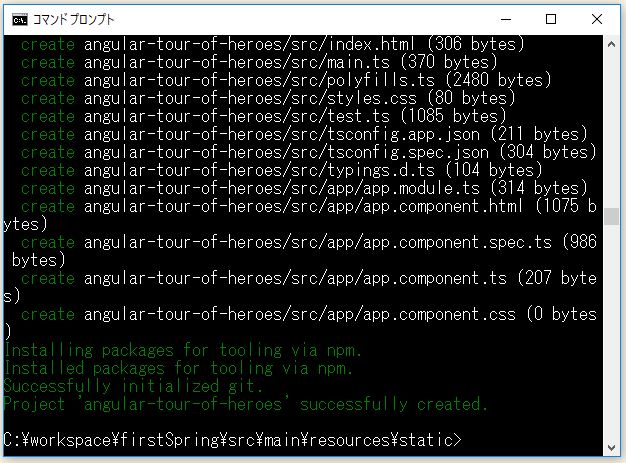
作成されました!ちょっと時間かかりますが。
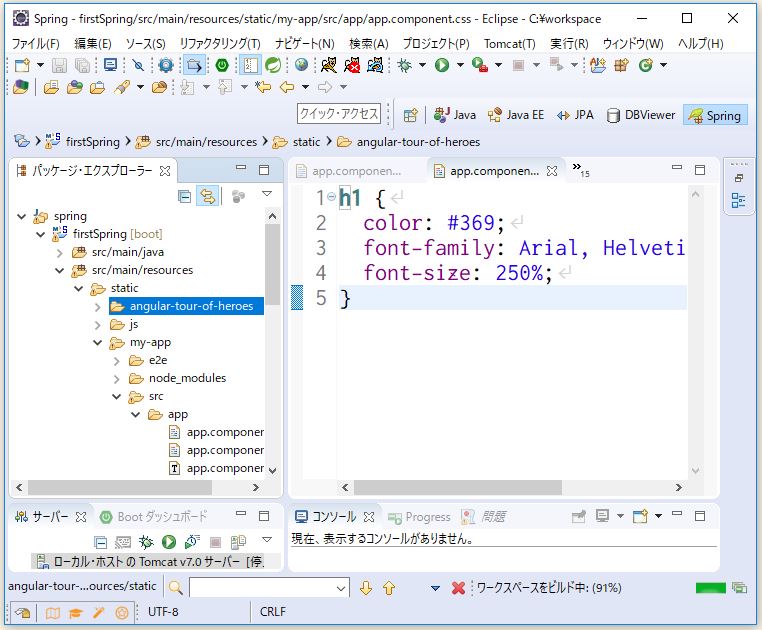
「npm start」でコードが変更されたときにブラウザを更新、ブラウザを再コンパイルまたは更新するために一時停止する必要がなくなるようです。
cd angular-tour-of-heroes
npm start
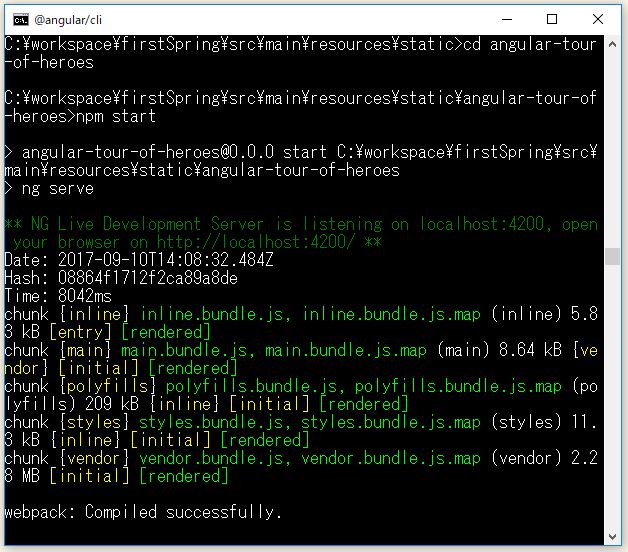
このまま、EclipseでTypeScriptのコードなどを編集して保存すると、即ブラウザに反映されるってことですかね。
チュートリアル通りに、「angular-tour-of-heroes」>「app」>「app.component.ts」ファイルを編集。
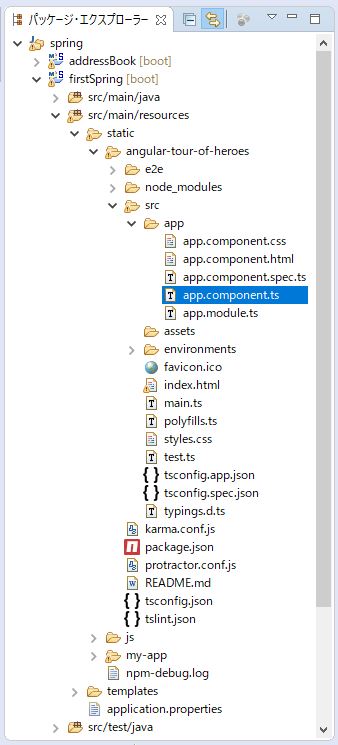
import { Component } from '@angular/core';

@Component({
  selector: 'app-root',
  templateUrl: './app.component.html',
  styleUrls: ['./app.component.css'],
  template: '<h1>{{title}}</h1><h2>{{hero}} details!</h2>'
})
export class AppComponent {
  title = 'Tour of Heroes';
  hero: 'Windstorm'
}
保存して、ブラウザで『http://localhost:4200』にアクセス。
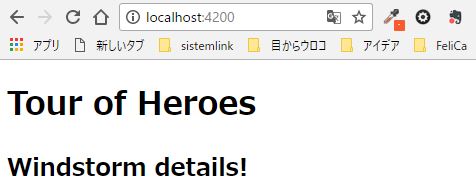
「app.component.ts」の内容が反映されています。
更に、「app.component.ts」を変更し、
import { Component } from '@angular/core';

export class Hero {
  id: number;
  name: string;
}

@Component({
  selector: 'app-root',
  templateUrl: './app.component.html',
  styleUrls: ['./app.component.css'],
  template: '<h1>{{title}}</h1><h2>{{hero.name}} {{hero.id}} details!</h2>'
})
export class AppComponent {
  title = 'Tour of Heroes';
  hero: Hero = {
    id: 9,
    name: 'Rizin'
  };
}
保存して、ブラウザで『http://localhost:4200』にアクセス。
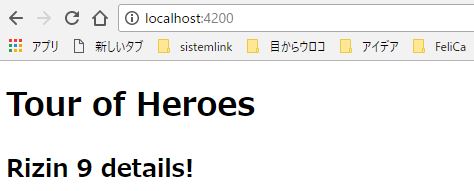
TypescriptはJavaのようにクラスを定義して、インスタンス化して値を使うような感じに似てますね。
Two-way binding(双方向データバインディング)
AngularJSの機能として、有名な「双方向データバインディング」は、AngularJSで用意されているFormsModuleを使う必要があるようです。
[(ngModel)] is the Angular syntax to bind the hero.name property to the textbox. Data flows in both directions: from the property to the textbox, and from the textbox back to the property.
Unfortunately, immediately after this change, the application breaks. If you looked in the browser console, you'd see Angular complaining that "ngModel ... isn't a known property of input."
Although NgModel is a valid Angular directive, it isn't available by default. It belongs to the optional FormsModule. You must opt-in to using that module.
import { Component } from '@angular/core';

export class Hero {
  id: number;
  name: string;
}

@Component({
  selector: 'app-root',
  // templateUrl: './app.component.html',
  // styleUrls: ['./app.component.css'],
  template: `
    <h1>{{title}}</h1>
    <h2>{{hero.name}} details!</h2>
    <div><label>id: </label>{{hero.id}}</div>
    <div>
      <label>name: </label>
      <input [(ngModel)]="hero.name" placeholder="name">
    </div>
    `
})
export class AppComponent {
  title = 'Tour of Heroes';
  hero: Hero = {
    id: 9,
    name: 'Rizin'
  };
}
「angular-tour-of-heroes」>「app」>「app.module.ts」ファイルも編集。
import { BrowserModule } from '@angular/platform-browser';
import { NgModule } from '@angular/core';
import {FormsModule} from '@angular/forms';  // 追加

import { AppComponent } from './app.component';

@NgModule({
  declarations: [
    AppComponent
  ],
  imports: [
    BrowserModule,
    FormsModule // 追加
  ],
//  providers: [],
  bootstrap: [AppComponent]
})
export class AppModule { }
保存して、ブラウザで『http://localhost:4200』にアクセス。
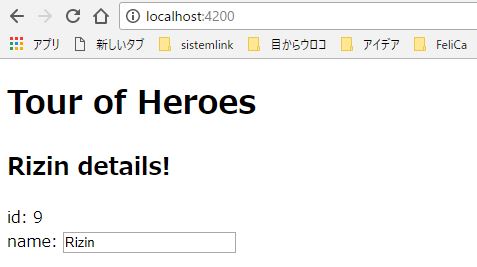
Master/Detail
続いて、リスト一覧?っぽい感じの実装。
import { Component } from '@angular/core';

export class Hero {
  id: number;
  name: string;
}

const HEROES: Hero[] = [
  { id: 11, name: 'Mr. Nice' },
  { id: 12, name: 'Narco' },
  { id: 13, name: 'Bombasto' },
  { id: 14, name: 'Celeritas' },
  { id: 15, name: 'Magneta' },
  { id: 16, name: 'RubberMan' },
  { id: 17, name: 'Dynama' },
  { id: 18, name: 'Dr IQ' },
  { id: 19, name: 'Magma' },
  { id: 20, name: 'Tornado' }
];

@Component({
  selector: 'app-root',
  // templateUrl: './app.component.html',
  // styleUrls: ['./app.component.css'],
  template: `
    <h1>{{title}}</h1>
    <h2>My Heroes</h2>
    <ul class="heroes">
      <li *ngFor="let hero of heroes"
        [class.selected]="hero === selectedHero"
        (click)="onSelect(hero)">
        <span class="badge">{{hero.id}}</span> {{hero.name}}
      </li>
    </ul>
    <div *ngIf="selectedHero">
      <h2>{{selectedHero.name}} details!</h2>
      <div><label>id: </label>{{selectedHero.id}}</div>
      <div>
        <label>name: </label>
        <input [(ngModel)]="selectedHero.name" placeholder="name"/>
      </div>
    </div>
  `,
  styles: [`
    .selected {
      background-color: #CFD8DC !important;
      color: white;
    }
    .heroes {
      margin: 0 0 2em 0;
      list-style-type: none;
      padding: 0;
      width: 15em;
    }
    .heroes li {
      cursor: pointer;
      position: relative;
      left: 0;
      background-color: #EEE;
      margin: .5em;
      padding: .3em 0;
      height: 1.6em;
      border-radius: 4px;
    }
    .heroes li.selected:hover {
      background-color: #BBD8DC !important;
      color: white;
    }
    .heroes li:hover {
      color: #607D8B;
      background-color: #DDD;
      left: .1em;
    }
    .heroes .text {
      position: relative;
      top: -3px;
    }
    .heroes .badge {
      display: inline-block;
      font-size: small;
      color: white;
      padding: 0.8em 0.7em 0 0.7em;
      background-color: #607D8B;
      line-height: 1em;
      position: relative;
      left: -1px;
      top: -4px;
      height: 1.8em;
      margin-right: .8em;
      border-radius: 4px 0 0 4px;
    }
  `]})
export class AppComponent {
  title = 'Tour of Heroes';
  heroes = HEROES;
  selectedHero: Hero;

  onSelect(hero: Hero): void {
    this.selectedHero = hero;
  }
}
保存して、ブラウザで『http://localhost:4200』にアクセス。

チュートリアルによると、「app.component.ts」で定義していた「onSelect()」メソッドによって、「selectedHero」プロパティに引数で受け取った「hero」インスタンスがセットされるようです。
The hero names should all be unselected before the user picks a hero, so you won't initialize the selectedHero as you did with hero.
Add an onSelect() method that sets the selectedHero property to the hero that the user clicks.
onSelect(hero: Hero): void {
this.selectedHero = hero;
}
で、実際「onSelect()」メソッドの引数は、「*ngFor="let hero of heroes"」の繰り返し処理で、「src/app/app.component.ts」で定義されていた
const HEROES: Hero[] = [
  { id: 11, name: 'Mr. Nice' },
  { id: 12, name: 'Narco' },
  { id: 13, name: 'Bombasto' },
  { id: 14, name: 'Celeritas' },
  { id: 15, name: 'Magneta' },
  { id: 16, name: 'RubberMan' },
  { id: 17, name: 'Dynama' },
  { id: 18, name: 'Dr IQ' },
  { id: 19, name: 'Magma' },
  { id: 20, name: 'Tornado' }
];
「HEROES」が「heroes」の値で、「HEROES」の中に入っている「Hero」インスタンス1つ1つが「hero」になるので、「hero」の数だけonSelect()メソッドも準備されるっぽいですね。
<li *ngFor="let hero of heroes"
[class.selected]="hero === selectedHero"
(click)="onSelect(hero)">
<span class="badge">{{hero.id}}</span> {{hero.name}}
</li>クリック(「onSelect()」メソッドが実行される) によって、「selectedHero」には「hero」が必ず入ることになるので、
In the template, add the following [class.selected] binding to the <li>:
[class.selected]="hero === selectedHero"
When the expression (hero === selectedHero) is true, Angular adds the selected CSS class. When the expression is false, Angular removes the selected class.
クリックした要素(「li」タグ )に「class="selected"」が追加され、

「*ngIf」の条件で、「selectedHero」プロパティが存在するかと聞かれますが、「onSelect()」メソッドが実行された段階で、「this.selectedHero = hero」で「selectedHero」プロパティに「hero」インスタンスが代入されるので、「*ngIf」がtrueとなって、
Wrap the HTML hero detail content of the template with a <div>. Then add the ngIf built-in directive and set it to the selectedHero property of the component.
<div *ngIf="selectedHero">
<h2>{{selectedHero.name}} details!</h2>
<div><label>id: </label>{{selectedHero.id}}</div>
<div>
<label>name: </label>
<input [(ngModel)]="selectedHero.name" placeholder="name"/>
</div>
</div>
テキストエリアとかが表示されますね。
Multiple Components
コンポーネントを分離して再利用できるようにしていくようです。
「app.component.ts」では、他のコンポートをimportしていくような設計が望ましいってことですかね?
コンポーネントを作ったら、「app.modules.ts」でも作ったコンポーネントをimportし、「app.modules.ts」の中の「declarations」にも追加しておく必要があるようです。
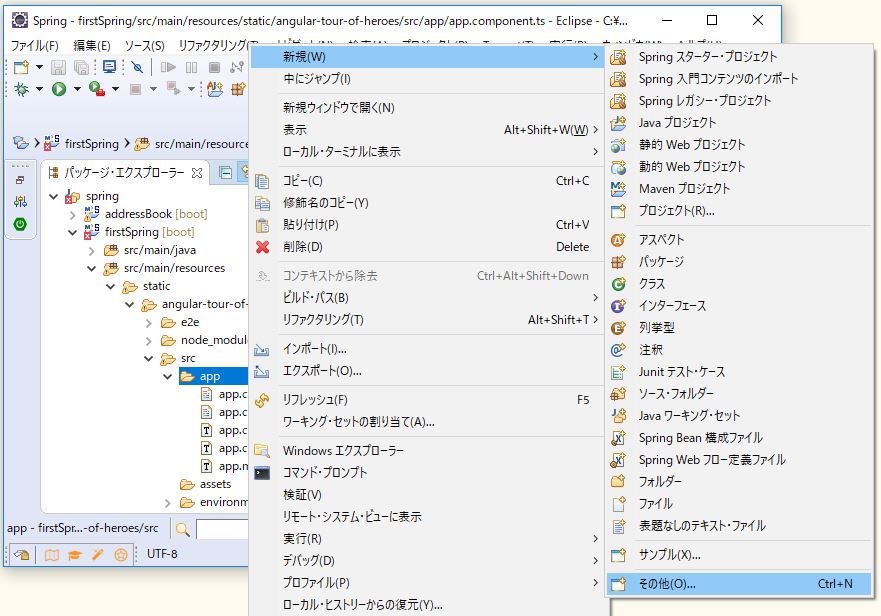
「angular-tour-of-heroes」>「app」>「hero-detail.component.ts」 ファイルを新しく作成していきます。「angular-tour-of-heroes」>「app」>「hero-detail.component.ts」を選択しした状態で右クリックし、「新規(W)」>「その他(O)...」をクリック。
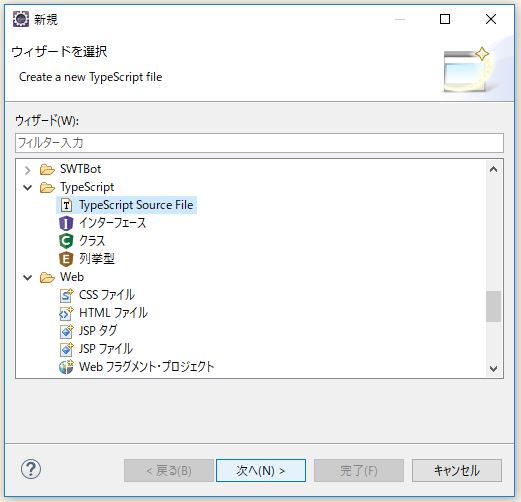
「TypeScript」>「TypeScript Source File」を選択し「次へ(N)>」。
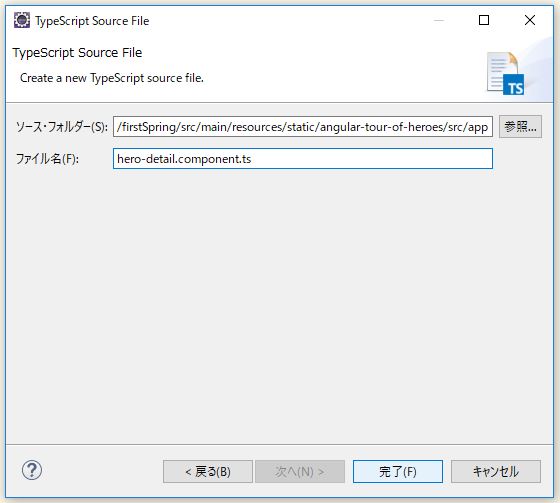
「ファイル名(F):」を「hero-detail.component.ts」とします。
「angular-tour-of-heroes」>「app」>「hero-detail.component.ts」 ファイルができました。

同じ流れで、もう一つ、新しく 「angular-tour-of-heroes」>「app」>「hero.ts」 ファイルを作成します。

ファイルを編集。
hero.ts
export class Hero {
  id: number;
  name: string;
}
hero-detail.component.ts
import { Component, Input } from '@angular/core';

import { Hero } from './hero';
@Component({
  selector: 'hero-detail',
  template: `
    <div *ngIf="hero">
      <h2>{{hero.name}} details!</h2>
      <div><label>id: </label>{{hero.id}}</div>
      <div>
        <label>name: </label>
        <input [(ngModel)]="hero.name" placeholder="name"/>
      </div>
    </div>
  `
})
export class HeroDetailComponent {
  @Input() hero: Hero;
}
app.component.ts
import { Component } from '@angular/core';

import { Hero } from './hero';

const HEROES: Hero[] = [
  { id: 11, name: 'Mr. Nice' },
  { id: 12, name: 'Narco' },
  { id: 13, name: 'Bombasto' },
  { id: 14, name: 'Celeritas' },
  { id: 15, name: 'Magneta' },
  { id: 16, name: 'RubberMan' },
  { id: 17, name: 'Dynama' },
  { id: 18, name: 'Dr IQ' },
  { id: 19, name: 'Magma' },
  { id: 20, name: 'Tornado' }
];

@Component({
  selector: 'app-root',
  // templateUrl: './app.component.html',
  // styleUrls: ['./app.component.css'],
  template: `
    <h1>{{title}}</h1>
    <h2>My Heroes</h2>
    <ul class="heroes">
      <li *ngFor="let hero of heroes"
        [class.selected]="hero === selectedHero"
        (click)="onSelect(hero)">
        <span class="badge">{{hero.id}}</span> {{hero.name}}
      </li>
    </ul>
    <hero-detail [hero]="selectedHero"></hero-detail>
  `,
  styles: [`
    .selected {
      background-color: #CFD8DC !important;
      color: white;
    }
    .heroes {
      margin: 0 0 2em 0;
      list-style-type: none;
      padding: 0;
      width: 15em;
    }
    .heroes li {
      cursor: pointer;
      position: relative;
      left: 0;
      background-color: #EEE;
      margin: .5em;
      padding: .3em 0;
      height: 1.6em;
      border-radius: 4px;
    }
    .heroes li.selected:hover {
      background-color: #BBD8DC !important;
      color: white;
    }
    .heroes li:hover {
      color: #607D8B;
      background-color: #DDD;
      left: .1em;
    }
    .heroes .text {
      position: relative;
      top: -3px;
    }
    .heroes .badge {
      display: inline-block;
      font-size: small;
      color: white;
      padding: 0.8em 0.7em 0 0.7em;
      background-color: #607D8B;
      line-height: 1em;
      position: relative;
      left: -1px;
      top: -4px;
      height: 1.8em;
      margin-right: .8em;
      border-radius: 4px 0 0 4px;
    }
  `]})
export class AppComponent {
  title = 'Tour of Heroes';
  heroes = HEROES;
  selectedHero: Hero;

  onSelect(hero: Hero): void {
    this.selectedHero = hero;
  }
}
app.module.ts
import { BrowserModule } from '@angular/platform-browser';
import { NgModule } from '@angular/core';
import { FormsModule } from '@angular/forms';

import { AppComponent } from './app.component';
import { HeroDetailComponent } from './hero-detail.component'; // 追加


@NgModule({
  declarations: [
    AppComponent,
    HeroDetailComponent // 追加
  ],
  imports: [
    BrowserModule,
    FormsModule
  ],
//  providers: [],
  bootstrap: [AppComponent]
})
export class AppModule { }
「app.component.ts」の「selecter」が「my-app」だとなぜかエラーが出るので、「app-root」にしてます。
⇧ を参考に、「src」>「tslint.json」の該当箇所と思われる
"directive-selector": [true, "attribute", "app", "camelCase"],
"component-selector": [true, "element", "app", "kebab-case"],
を
"directive-selector": [
  true,
  "attribute",
  ["app", "my-app", "hero-detail"],
  "camelCase"
],
"component-selector": [
  true,
  "element",
  ["app", "my-app", "hero-detail"],
  "kebab-case"
],
とかにしてみても、「my-app」はエラーになってしまいました。う~ん、分からん。不安が残りますが、次回は残りの「Service」のチュートリアルからトライしていきたいと思います。
2017年9月16日(土) 追記
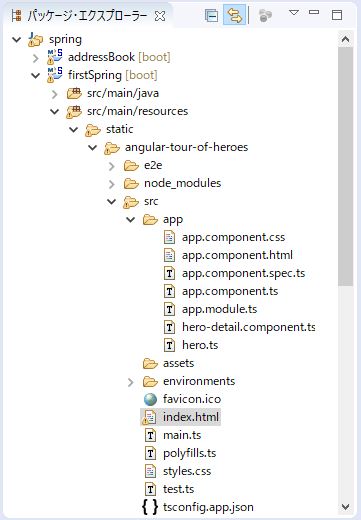
「static」>「angular-tour-of-heroes」>「src」>「index.html」のファイルを、
<!doctype html>
<html lang="en">
<head>
  <meta charset="utf-8">
  <title>AngularTourOfHeroes</title>
  <base href="/">

  <meta name="viewport" content="width=device-width, initial-scale=1">
  <link rel="icon" type="image/x-icon" href="favicon.ico">
</head>
<body>
<app-root></app-root>
</body>
</html>
から
<!doctype html>
<html lang="en">
<head>
  <meta charset="utf-8">
  <title>AngularTourOfHeroes</title>
  <base href="/">

  <meta name="viewport" content="width=device-width, initial-scale=1">
  <link rel="icon" type="image/x-icon" href="favicon.ico">
</head>
<body>
<my-app></my-app>
</body>
</html>
とし、「app.component.ts」の、「@Component」の中の「selecter: app-root」となっていた部分を「selecter: my-app」に合わせる必要があったようです。

「不明なタグ」という警告は出てしまってますが、「my-app」で動きました。