
⇧ amazing...
Elastic Stackとは
公式の説明によりますと、
Elasticsearch、Kibana、Beats、Logstashなどで構成される、Elastic Stack(ELK Stackとも呼ばれる)。Elastic Stackを使えばあらゆるソースから、あらゆるフォーマットでデータを取得でき、リアルタイムに検索、分析、可視化することができます。
⇧ 4つのツールをElastic Stackというそうな。
GitHubだと、
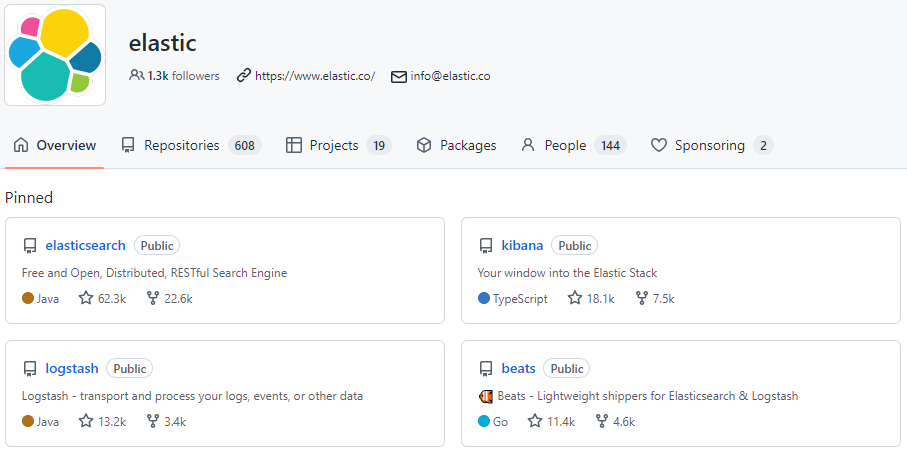
⇧ ピン止めされてるプロジェクトの内、4つがElastic Stackということになるってことね。
Elasticsearch、Logstash、Kibanaをインストールしてみる
というわけで、
⇧ 上記サイト様を参考に、WSL 2(Windows SubSystem for Linux 2)のUbuntuにインストールしてみます。
Elasticsearch 8については、
⇧ セキュリティの仕様が変わったらしく、
⇧ 無効にするか、
⇧ パスワードとCA証明書を指定してアクセスする必要があるみたい。
とりあえず、ElasticSearchからインストールしていきます。
⇧ 今回、Ubuntuにインストールしていくので、上記のPackage Managersのapt-getのリンクをクリックすると、
⇧ インストール手順が載っているので、実施していきます。
まずは、WSL 2(Windows SubSystem for Linux 2)のUbuntuを固定IPアドレスで起動。

ElasticSearchのインストールをできるように認証を設定。
wget -qO - https://artifacts.elastic.co/GPG-KEY-elasticsearch | sudo gpg --dearmor -o /usr/share/keyrings/elasticsearch-keyring.gpg

sudo apt-get install apt-transport-https

リポジトリの登録。
echo "deb [signed-by=/usr/share/keyrings/elasticsearch-keyring.gpg] https://artifacts.elastic.co/packages/8.x/apt stable main" | sudo tee /etc/apt/sources.list.d/elastic-8.x.list

ElasticSearchをインストール。
sudo apt-get update && sudo apt-get install elasticsearch

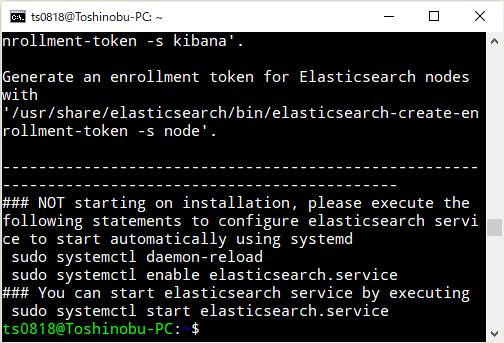
ログを見る感じ、
Get:1 https://artifacts.elastic.co/packages/8.x/apt stable InRelease [10.4 kB]
Hit:2 http://archive.ubuntu.com/ubuntu focal InRelease
Get:3 http://archive.ubuntu.com/ubuntu focal-updates InRelease [114 kB]
Get:4 https://artifacts.elastic.co/packages/8.x/apt stable/main amd64 Packages [41.3 kB]
Get:5 http://security.ubuntu.com/ubuntu focal-security InRelease [114 kB]
Get:6 http://archive.ubuntu.com/ubuntu focal-backports InRelease [108 kB]
Fetched 388 kB in 2s (175 kB/s)
Reading package lists... Done
Reading package lists... Done
Building dependency tree
Reading state information... Done
The following NEW packages will be installed:
  elasticsearch
0 upgraded, 1 newly installed, 0 to remove and 247 not upgraded.
Need to get 581 MB of archives.
After this operation, 1194 MB of additional disk space will be used.
Get:1 https://artifacts.elastic.co/packages/8.x/apt stable/main amd64 elasticsearch amd64 8.5.3 [581 MB]
Fetched 581 MB in 2min 55s (3319 kB/s)
Selecting previously unselected package elasticsearch.
(Reading database ... 33563 files and directories currently installed.)
Preparing to unpack .../elasticsearch_8.5.3_amd64.deb ...
Creating elasticsearch group... OK
Creating elasticsearch user... OK
Unpacking elasticsearch (8.5.3) ...
Setting up elasticsearch (8.5.3) ...
System has not been booted with systemd as init system (PID 1). Can't operate.
Failed to connect to bus: Host is down
--------------------------- Security autoconfiguration information ------------------------------

Authentication and authorization are enabled.
TLS for the transport and HTTP layers is enabled and configured.

The generated password for the elastic built-in superuser is : 5rVqjSU_*Ujc5u*YoFHl

If this node should join an existing cluster, you can reconfigure this with
'/usr/share/elasticsearch/bin/elasticsearch-reconfigure-node --enrollment-token <token-here>'
after creating an enrollment token on your existing cluster.

You can complete the following actions at any time:

Reset the password of the elastic built-in superuser with
'/usr/share/elasticsearch/bin/elasticsearch-reset-password -u elastic'.

Generate an enrollment token for Kibana instances with
 '/usr/share/elasticsearch/bin/elasticsearch-create-enrollment-token -s kibana'.

Generate an enrollment token for Elasticsearch nodes with
'/usr/share/elasticsearch/bin/elasticsearch-create-enrollment-token -s node'.

-------------------------------------------------------------------------------------------------
### NOT starting on installation, please execute the following statements to configure elasticsearch service to start automatically using systemd
 sudo systemctl daemon-reload
 sudo systemctl enable elasticsearch.service
### You can start elasticsearch service by executing
 sudo systemctl start elasticsearch.service
で、また、WSL 2(Windows SubSystem for Linux 2)の問題なのか、systemctlが有効になっていない...

⇧ う~む、設定はできてるっぽいんだけどな...
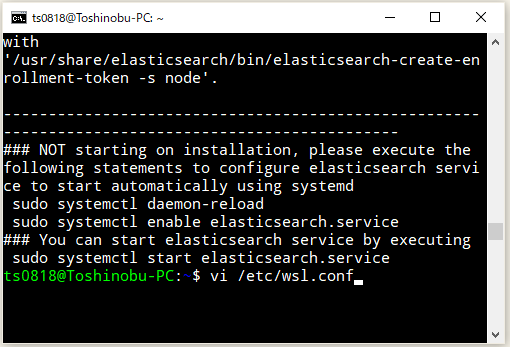
WSL自体のアップグレードをするしかないっぽいのかな、というわけで、
⇧ GitHubからダウンロードして、適当な場所に配置。

とりあえず、
⇧ 上記サイト様を参考に、WSLのインストール。
Add-AppxPackage -Path C:\Users\Toshinobu\Desktop\soft_work\wsl2\Microsoft.WSL_1.0.3.0_x64_ARM64.msixbundle

wsl --versionが使えるようになったので、バージョンアップできた模様。

systemctlが利用できるようになったので、

ElasticSearchのサービスを起動しておく。

続いてLogstashをインストールしていきます。
⇧ 上記でPackage Managersのapt-getのリンクをクリックすると、
⇧ インストール手順が載ってるけど、ElasticSearchをインストールした時と同じリポジトリを使うようなので、ElasticSearchをインストールした時点でリポジトリの用意はできてるので、
sudo apt-get update && sudo apt-get install logstash
でOK。


続いて、Kibanaをインストール。
⇧ 上記でPackage Managersのapt-getのリンクをクリックすると、
⇧ 同じようにインストール手順が載ってるので、インストール。
sudo apt-get update && sudo apt-get install kibana


kibanaのサービスが起動して無いっぽいので、
⇧ 上記サイト様を参考に、サービス起動。
sudo /bin/systemctl daemon-reload
sudo /bin/systemctl enable kibana.service
sudo systemctl start kibana.service

でも、ブラウザからアクセス出来ない...
⇧ kibanaの設定ファイルを修正する必要があるそうな。

ポートとホストを設定。


kibanaのサービスを再起動して、設定を反映する。

一応、ポートもフォワードしておく。

で、kibanaのサービスがポート5061で起動できてるようです。

ブラウザからアクセスできました。

単純にインストールしただけだと、いろいろ接続できないっぽいですね...
Kibana以外も、設定とかしないといけないんかな?
毎度モヤモヤ感が半端ない...
今回はこのへんで。