
⇧ amazing...
Queueを扱うシステム
そも、Queueとは?
In computer science, a queue is a collection of entities that are maintained in a sequence and can be modified by the addition of entities at one end of the sequence and the removal of entities from the other end of the sequence. By convention, the end of the sequence at which elements are added is called the back, tail, or rear of the queue, and the end at which elements are removed is called the head or front of the queue, analogously to the words used when people line up to wait for goods or services.

Representation of a FIFO (first in, first out) queue
⇧ entityのcollectionであると。う~む、分からん。
で、Javaで利用できるQueueを扱えるシステムは、

⇧ 様々なものがありますと。
Apache Kafkaとは?
公式のドキュメントによると、
Apache Kafka is an open-source distributed event streaming platform used by thousands of companies for high-performance data pipelines, streaming analytics, data integration, and mission-critical applications.
⇧ 分散イベントストリーミングプラットフォームですと、う~む、全く分からん...

⇧ Topicなるものが中心となってそうなんだけど、


⇧ 全体像としては、上図がイメージしやすいかと。
Spring BootでApache Kafkaを使ってみる
とりあえず、使ってみますか。
⇧ 上記サイト様を参考にさせていただいたところ、Apache KafkaのKafka Clusterってのを管理するのにApache ZooKeeperってのが必要らしい。
イメージ的には、Javaを使う場合に限らないと思うけど、

本番環境ではサーバーが3つ必要になる感じなんかな。
ちなみに、ZooKeeperさん
ZooKeeper is a distributed, open-source coordination service for distributed applications. It exposes a simple set of primitives that distributed applications can build upon to implement higher level services for synchronization, configuration maintenance, and groups and naming. It is designed to be easy to program to, and uses a data model styled after the familiar directory tree structure of file systems. It runs in Java and has bindings for both Java and C.
ZooKeeper用にサーバーが必要なので、仮想マシンかコンテナを用意せざるを得ないってことかと。
ちなみに、
⇧ ZooKeeperの代わりに、KRaftってのを利用する方法もあるらしい、と言うか、
The Kafka community plans to deprecate ZooKeeper in the next release (3.4) and then remove it entirely in version 4.0.
⇧ ZooKeeperが廃止される予定なんだとか。
ってことは、新規で導入するんであればKRaftってものを使っていった方が良いってことですかね。
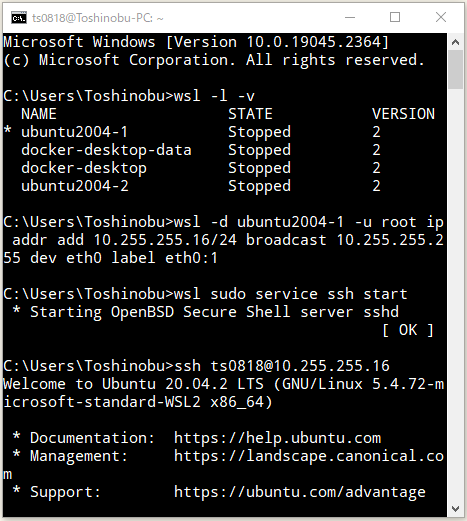
今回は、WSL 2(Windows SubSystem for Linux 2)のUbuntuにApache Kafkaをインストールしようと思います。
今回の件とは関係ないですが、
⇧ 上記の記事の時のように、固定IPアドレスを設定して起動することにします。

Apache Kafkaをダウンロード。
wget https://dlcdn.apache.org/kafka/3.3.1/kafka_2.13-3.3.1.tgz

展開(解凍)します。
tar kafka_2.13-3.3.1.tgz

Apache Kafkaを動かすには、Java 8以上をインストールしてる必要があるようです、インストールされとらんかった...
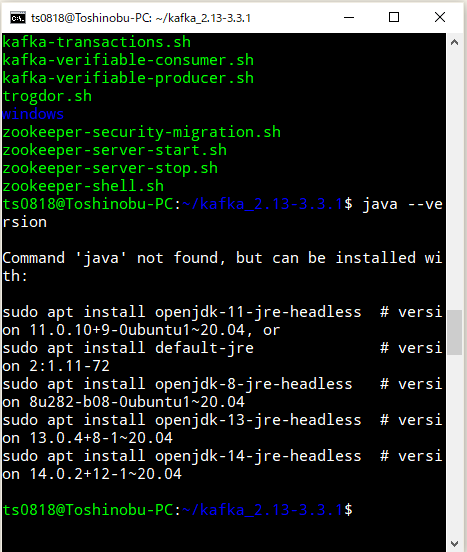
Javaのインストールを行うも、

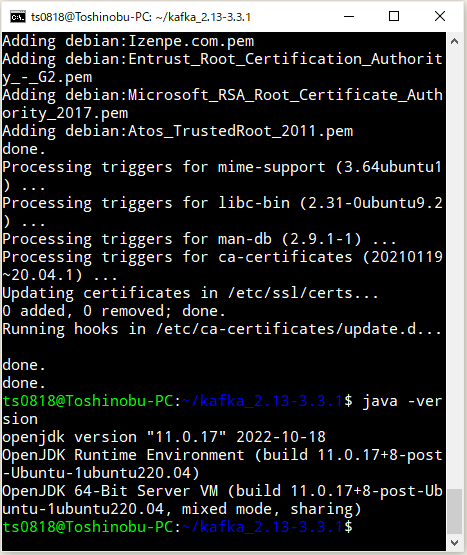
インストール失敗で、apt-get updateしろって言われたのでする。

再度、Javaのインストール。
Javaがインストールできたので、Apache Kafkaを起動する。
KAFKA_CLUSTER_ID="$(bin/kafka-storage.sh random-uuid)"
bin/kafka-storage.sh format -t $KAFKA_CLUSTER_ID -c config/kraft/server.properties
bin/kafka-server-start.sh config/kraft/server.properties

⇧ Apache Kafkaのサーバーが起動した模様。
あとは、

⇧ topicまでは作成しておく必要があるようなので、コマンドプロンプトをもう一つ起ち上げて、WSL 2のUbuntuにログインして、topicを作成。
bin/kafka-topics.sh --create --topic quickstart-events --bootstrap-server localhost:9092
bin/kafka-topics.sh --describe --topic quickstart-events --bootstrap-server localhost:9092

で、WSL 2(Windows SubSystem for Linux 2)だけの問題なのか、
⇧ Apache Kafkaの設定ファイルを編集するか、Windows側でプロキシのポートフォワードする必要があるらしい。
今回は、Windows側でプロキシのポートフォワードする方法で対応しました。


ここまで、用意できたら、Java側からメッセージが送れるようになるらしいので、Java側の準備を進めます。
Eclipseを起動して、「ファイル(F)」>「新規(N)」>「Spring スターター・プロジェクト(Spring Initializr)」を選択。

「名前」を適当に入力し、ビルドツールにGradleを使うことにするので、「タイプ:」を「Gradle - Groovy」にして、「次へ(N)>」を押下。

「Spring for Apache Kafka」の依存関係を追加で。


で、プロジェクトが作成されたらば、Apache KafkaにJavaのオブジェクトとかを送りたい場合は、jackson-databindの依存関係を追加する必要があるらしいので追加。
■/kafka-example/build.gradle
plugins {
	id 'java'
	id 'org.springframework.boot' version '2.7.8-SNAPSHOT'
	id 'io.spring.dependency-management' version '1.0.15.RELEASE'
}

group = 'com.example'
version = '0.0.1-SNAPSHOT'
sourceCompatibility = '11'

configurations {
	compileOnly {
		extendsFrom annotationProcessor
	}
}

repositories {
	mavenCentral()
	maven { url 'https://repo.spring.io/milestone' }
	maven { url 'https://repo.spring.io/snapshot' }
}

dependencies {
	implementation 'org.springframework.boot:spring-boot-starter-thymeleaf'
	implementation 'org.springframework.boot:spring-boot-starter-web'
	implementation 'org.springframework.kafka:spring-kafka'
	implementation 'com.fasterxml.jackson.core:jackson-databind'
	compileOnly 'org.projectlombok:lombok'
	developmentOnly 'org.springframework.boot:spring-boot-devtools'
	annotationProcessor 'org.projectlombok:lombok'
	testImplementation 'org.springframework.boot:spring-boot-starter-test'
	testImplementation 'org.springframework.kafka:spring-kafka-test'
}

tasks.named('test') {
	useJUnitPlatform()
}
そしたらば、application.propertiesに設定を追加。
■/kafka-example/src/main/resources/application.properties
spring.kafka.bootstrap-servers=10.255.255.16:9092
spring.kafka.consumer.group-id=myGroup

spring.kafka.producer.value-serializer=org.springframework.kafka.support.serializer.JsonSerializer
spring.kafka.consumer.value-deserializer=org.springframework.kafka.support.serializer.JsonDeserializer
spring.kafka.consumer.properties.spring.json.trusted.packages=*
⇧ IPアドレスは、ご自身の環境に合わせてください。DockerでコンテナとかでApache Kafkaを動かしてる場合は、localhostでもつながるらしいけど。
ファイルの配置などは以下のような感じになりました。

■/kafka-example/src/main/java/com/example/demo/dto/SampleDto.java
package com.example.demo.dto;

import java.io.Serializable;

import lombok.AllArgsConstructor;
import lombok.Data;
import lombok.NoArgsConstructor;

@Data
@AllArgsConstructor
@NoArgsConstructor
public class SampleDto implements Serializable {
  private String id;
  private String text;
}
■/kafka-example/src/main/java/com/example/demo/publisher/SamplePublisher.java
package com.example.demo.publisher;

import org.springframework.kafka.core.KafkaTemplate;
import org.springframework.stereotype.Component;

import com.example.demo.dto.SampleDto;

import lombok.AllArgsConstructor;

@Component
@AllArgsConstructor
public class SamplePublisher {
	KafkaTemplate<String, SampleDto> kafkaTemplate;

	public void publish(SampleDto sampleDto) {
		kafkaTemplate.send("sample-topic", sampleDto);
	}
}
■/kafka-example/src/main/java/com/example/demo/consumer/SampleConsumer.java
package com.example.demo.consumer;

import org.springframework.kafka.annotation.KafkaListener;
import org.springframework.stereotype.Component;

import com.example.demo.dto.SampleDto;

@Component
public class SampleConsumer {

	@KafkaListener(topics = "sample-topic")
	public void recieveMessage(SampleDto sampleDto) {
		System.out.println(sampleDto);
	}
}
■/kafka-example/src/main/java/com/example/demo/controller/SampleController.java
package com.example.demo.controller;

import org.springframework.beans.factory.annotation.Autowired;
import org.springframework.web.bind.annotation.GetMapping;
import org.springframework.web.bind.annotation.RequestMapping;
import org.springframework.web.bind.annotation.RestController;

import com.example.demo.dto.SampleDto;
import com.example.demo.publisher.SamplePublisher;

@RestController
@RequestMapping("sample")
public class SampleController {

	@Autowired
	private SamplePublisher samplePublisher;

	@GetMapping
	public String sample() {
		SampleDto sampleDto = new SampleDto("000000000001", "kafka test");
		samplePublisher.publish(sampleDto);
		return "OK";

	}
}
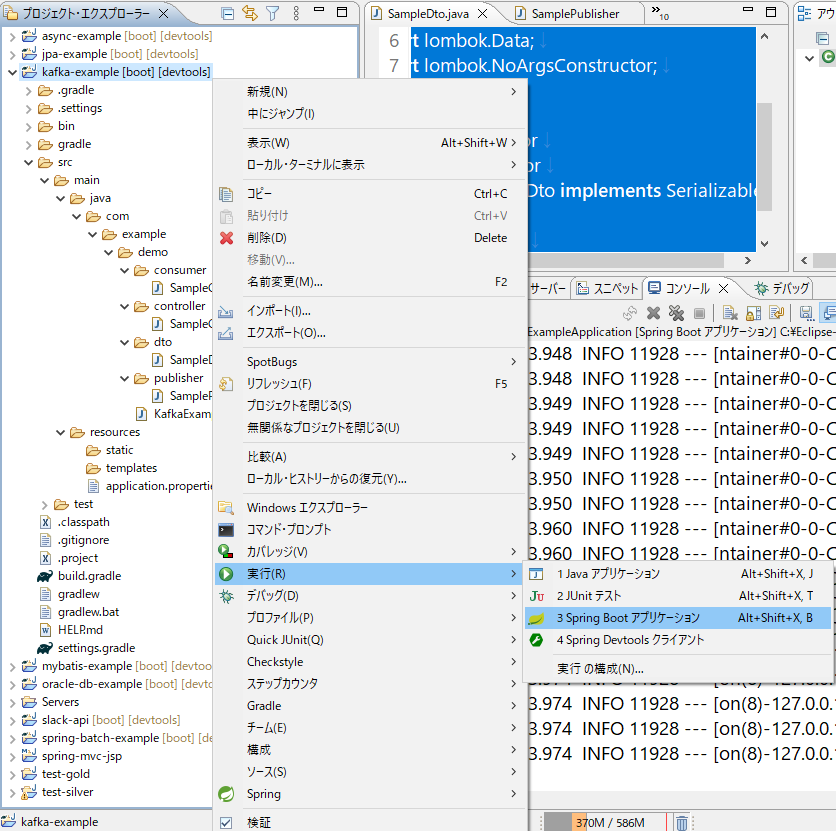
で、保存して、Spring Bootを実行で。
ブラウザで、Controllerクラスのエンドポイントにアクセス。

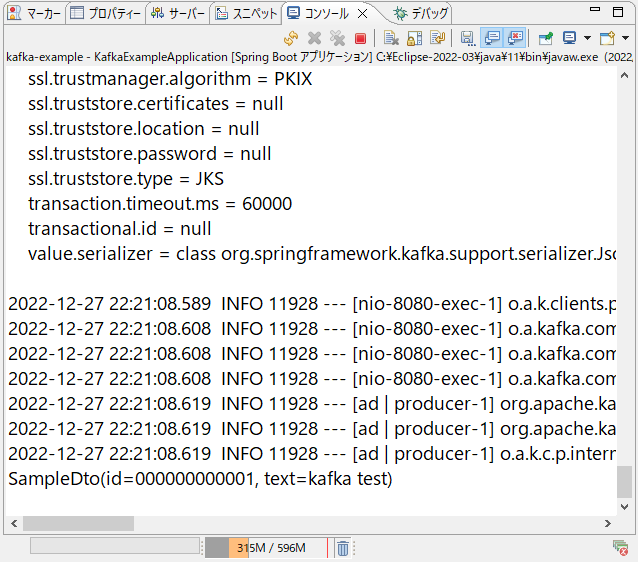
Spring BootのアプリケーションからApache Kafka側にメッセージが送られ、

Spring Boot側でApache Kafka側からの応答を受け取れました。
というわけで、Spring BootとApache Kafkaでメッセージのやり取りができました。
ただ、イマイチ、Apache Kafkaの上手い活用方法が分からんですな...
毎度モヤモヤ感が半端ない...
今回はこのへんで。