Webサーバーとしての機能も併せ持つTomcatですが、Webサーバーとしては別のサーバーを立てて連携するのが良いとのことで、今回はNginxでいってみたいと思います。
Nginxをインストール
まずはNginxを用意します。
nginx: download にアクセスし、「nginx/Windows-1.12.0」を選択します。

Zipファイルがダウンロードされるので、Cドライブに配置しました。

Nginx起動
とりあえず、Nginxが動くか確認してみます。
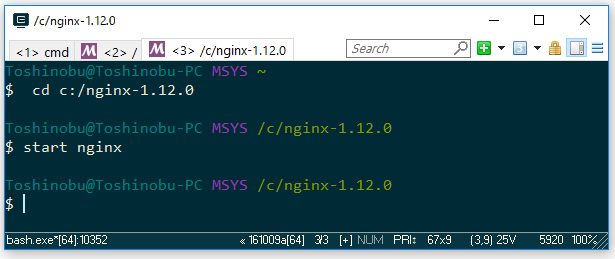
ConEmuを起動して、{bash::Msys2-64}を起動してます。
cd c:/nginx-1.12.0
start nginx

ブラウザからもhttp://localhostでアクセスできました。

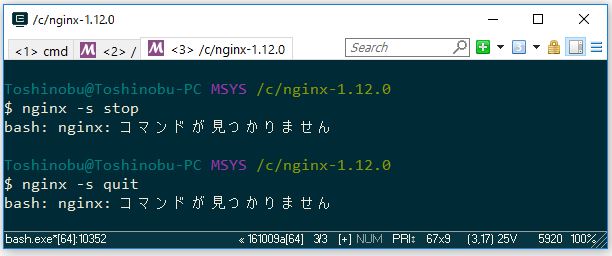
ですが、nginxを止めるコマンドがMsys2のbashからだと動かない....コマンドプロンプトだと動くんですが。

コマンドプロンプトだと実行できる。

⇩ 下記サイトによるとWindows のユーザープロファイルの設定が必要らしいです
⇩ Windows のユーザープロファイルについては下記サイトへ
・《第6問:解答》Windows 10のユーザープロファイルにはどんな種類がある? - 窓の杜
上記サイトによると、ユーザープロファイルには
- ローカルユーザープロファイル
- 移動ユーザープロファイル
- 固定ユーザープロファイル
- スーパー固定ユーザープロファイル
の種類があるらしいです。
で、ユーザプロファイルの環境変数ってのがどこのことなのかよく分からない。
⇩ 下記サイトによるとmsys2.iniの編集でもいけるようです。
msys2(msys2-launcher利用下)で環境変数を引き継ぎたい - write ahead log

変更前
#MSYS=winsymlinks:nativestrict
#MSYS=error_start:mingw64/bin/qtcreator.exe|-debug|<process-id>
#CHERE_INVOKING=1
#MSYS2_PATH_TYPE=inherit
MSYSTEM=MSYS
変更後
#MSYS=winsymlinks:nativestrict
#MSYS=error_start:mingw64/bin/qtcreator.exe|-debug|<process-id>
#CHERE_INVOKING=1
MSYS2_PATH_TYPE=inherit
MSYSTEM=MSYS
再起動で、無事...認識されないっつう話ですわ~。

なんか、コマンドプロンプト以外で使えるようにするには、環境変数に追加しないと駄目みたい...なんだかな~。

環境変数に追加したら動きました。

・nginx(エンジンエックス)をWindows上で動かして、SSLとリバースプロキシーの実験をした - 檜山正幸のキマイラ飼育記
nginx.confの設定
C:¥nginx-1.12.0¥conf¥nginx.confファイルを編集
#user  nobody;
worker_processes  1;

#error_log  logs/error.log;
#error_log  logs/error.log  notice;
#error_log  logs/error.log  info;

#pid        logs/nginx.pid;


events {
    worker_connections  1024;
}


http {
    include       mime.types;
    default_type  application/octet-stream;

    #log_format  main  '$remote_addr - $remote_user [$time_local] "$request" '
    #                  '$status $body_bytes_sent "$http_referer" '
    #                  '"$http_user_agent" "$http_x_forwarded_for"';

    #access_log  logs/access.log  main;

    sendfile        on;
    #tcp_nopush     on;

    #keepalive_timeout  0;
    keepalive_timeout  65;

    #gzip  on;

    server {
        listen       80;
        server_name  localhost;

        #charset koi8-r;

        #access_log  logs/host.access.log  main;

        # Java Tomcat
        location / {
            proxy_pass   http://localhost:8080/;
            root   html;
            index  index.html index.htm;
        }

        #error_page  404              /404.html;

        # redirect server error pages to the static page /50x.html
        #
        error_page   500 502 503 504  /50x.html;
        location = /50x.html {
            root   html;
        }

        # proxy the PHP scripts to Apache listening on 127.0.0.1:80
        #
        #location ~ \.php$ {
        #    proxy_pass   http://127.0.0.1;
        #}

        # pass the PHP scripts to FastCGI server listening on 127.0.0.1:9000
        #
        #location ~ \.php$ {
        #    root           html;
        #    fastcgi_pass   127.0.0.1:9000;
        #    fastcgi_index  index.php;
        #    fastcgi_param  SCRIPT_FILENAME  /scripts$fastcgi_script_name;
        #    include        fastcgi_params;
        #}

        # deny access to .htaccess files, if Apache's document root
        # concurs with nginx's one
        #
        #location ~ /\.ht {
        #    deny  all;
        #}
    }


    # another virtual host using mix of IP-, name-, and port-based configuration
    #
    #server {
    #    listen       8000;
    #    listen       somename:8080;
    #    server_name  somename  alias  another.alias;

    #    location / {
    #        root   html;
    #        index  index.html index.htm;
    #    }
    #}


    # HTTPS server
    #
    #server {
    #    listen       443 ssl;
    #    server_name  localhost;

    #    ssl_certificate      cert.pem;
    #    ssl_certificate_key  cert.key;

    #    ssl_session_cache    shared:SSL:1m;
    #    ssl_session_timeout  5m;

    #    ssl_ciphers  HIGH:!aNULL:!MD5;
    #    ssl_prefer_server_ciphers  on;

    #    location / {
    #        root   html;
    #        index  index.html index.htm;
    #    }
    #}

}
設定したら、nginx.exeのあるフォルダに移動し、nginxを起動します。
start nginx

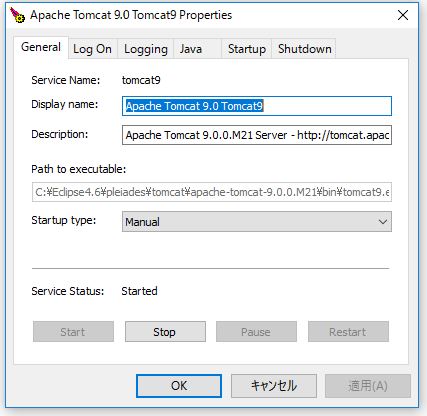
Tomcatも起動します。C:¥Eclipse4.6¥pleiades¥tomcat¥apache-tomcat-9.0.0.M21¥bin¥tomcat9w.exeをダブルクリックします。

『Start』をクリックします。「Service Status: Started」となれば起動してます。

http://localhost にアクセスでTomcatの画面が表示されればOkのようです。

nginxを止める場合は、
nginx -s quit
もしくは、
nginx -s stop
でいけるみたいです。

Eclipse経由のTomcatでもいけるかと、SSL(httpsでのアクセス)の設定もできればしていきたいですね。
今回はこのへんで。